iOS & iPadOS / tvOS / watchOS / Catalyst (macOS)
Apptimize supports experimentation and release management on iOS & iPadOS + Catalyst (macOS), tvOS, and watchOS through a single SDK. The instructions are the same for all platforms.
SDK Installation
Sign in to the Apptimize dashboard. You’ll see a welcome page that asks for the name of your app. After entering all your info, you’ll see these installation instructions again.
You have three options for installing the SDK(s):
Manual (Zero-Line) Installation
The SDK switched from static to dynamic at version 2.18.0. Please remove the SDK from your project and follow the installation instructions below to upgrade.
After you’re signed in, you’ll be able to download the Apptimize SDK. Unzip it, then drag and drop
Apptimize.xcframeworkinto your project. You’ll probably want to check the Copy items if needed option.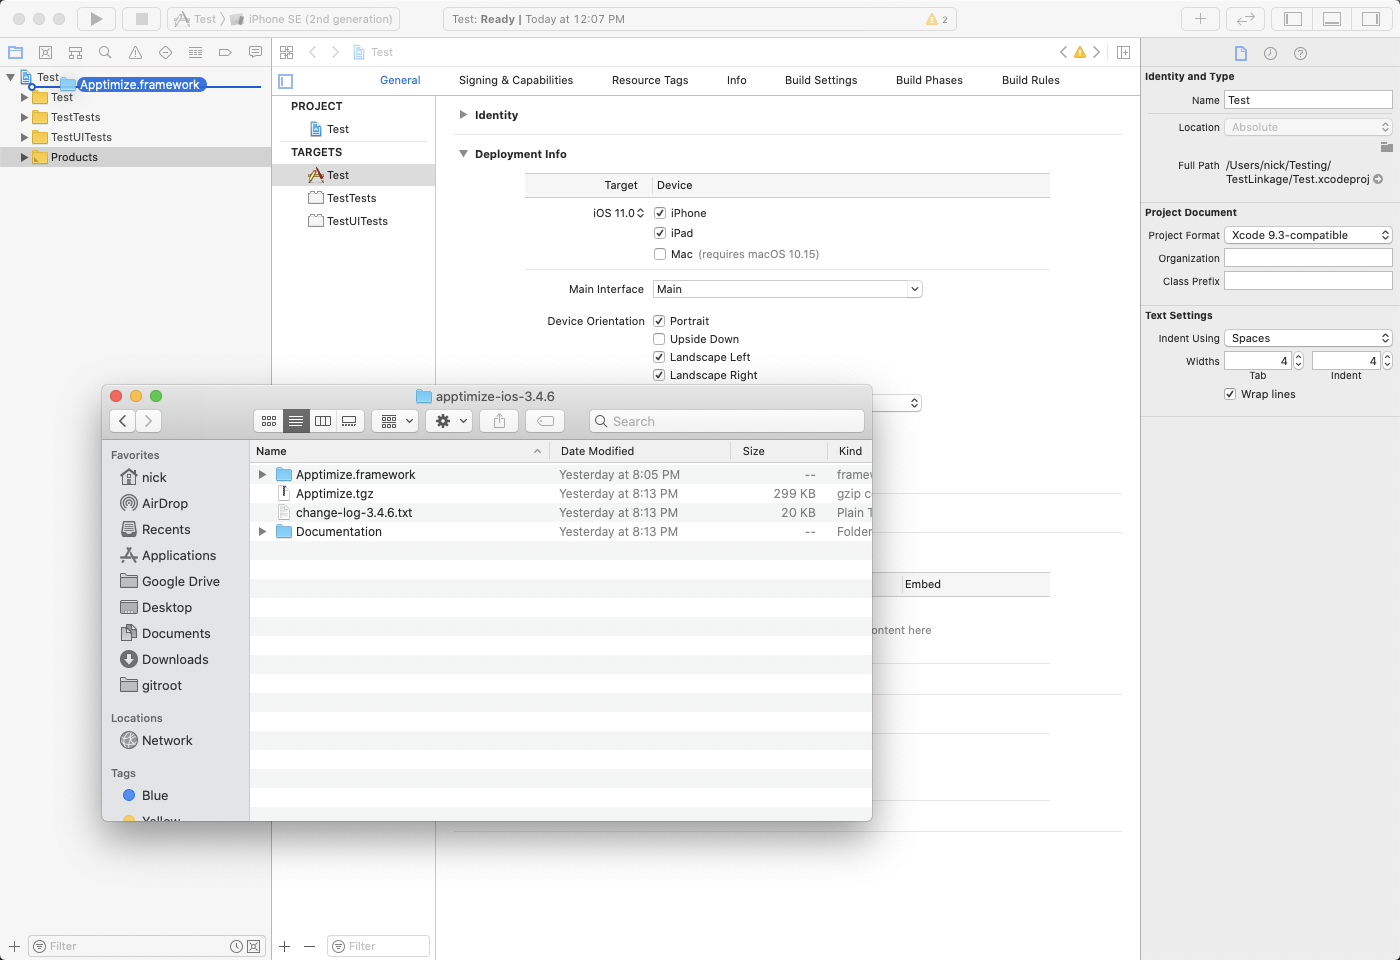
Select the project from the Project navigator.
Select the target application. For watchOS this will be your watch application’s Extension target.
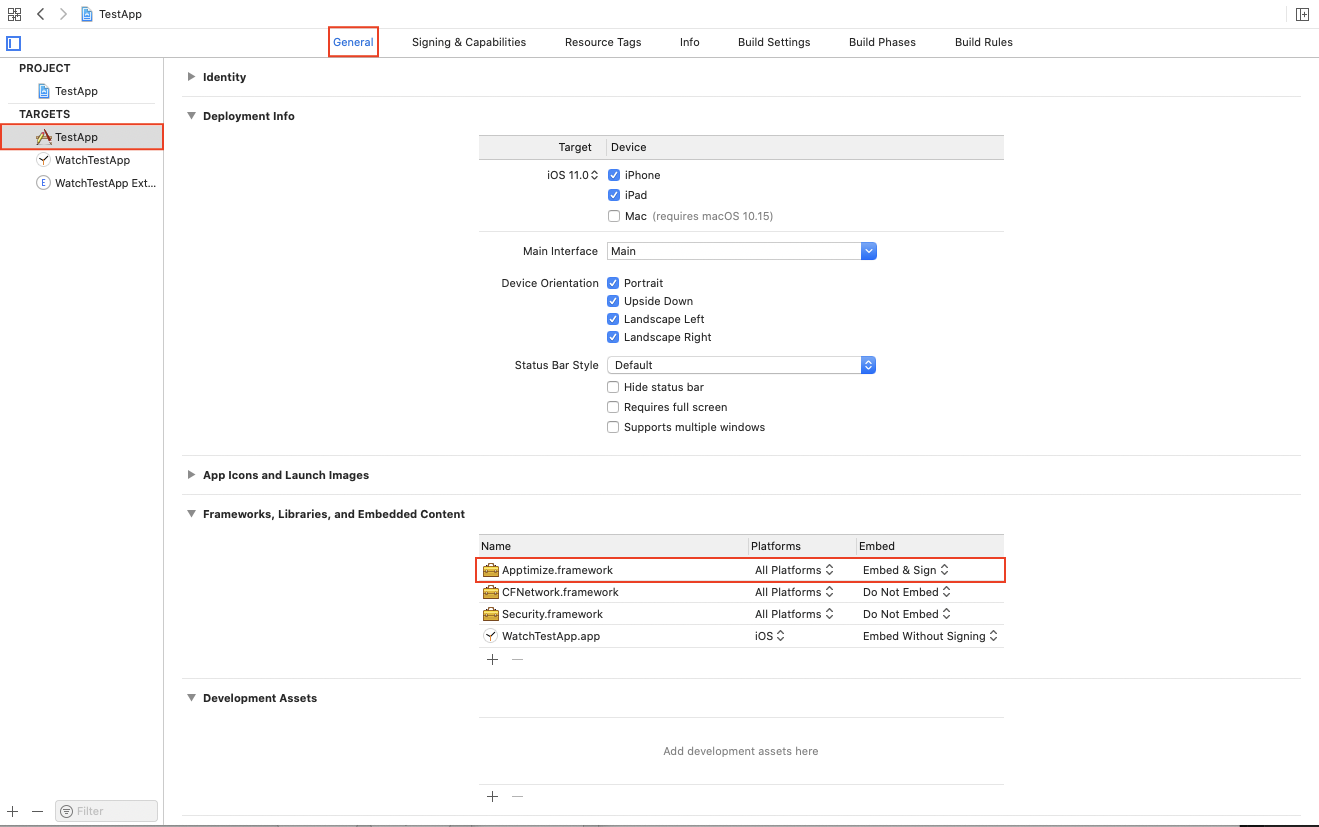
Go to the General tab. Drag the
Apptimize.xcframeworkfrom the project browser into the Frameworks, Libraries and Embedded Content section at the bottom of the page.Select Embed & Sign from the menu to the right of the added framework.
Swift Package Manager
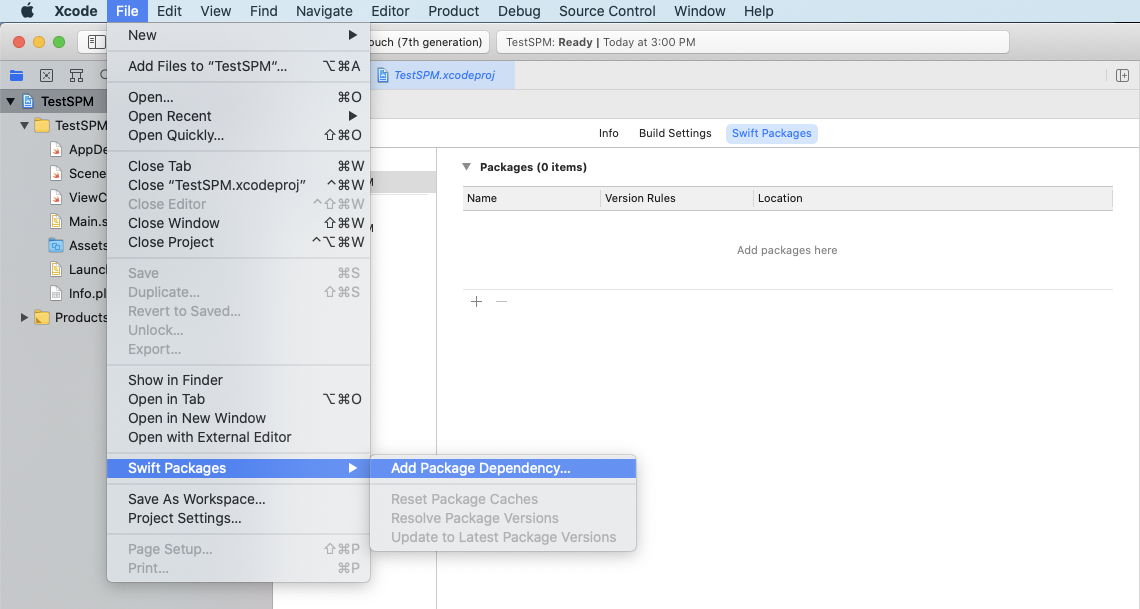
Open your project in XCode.
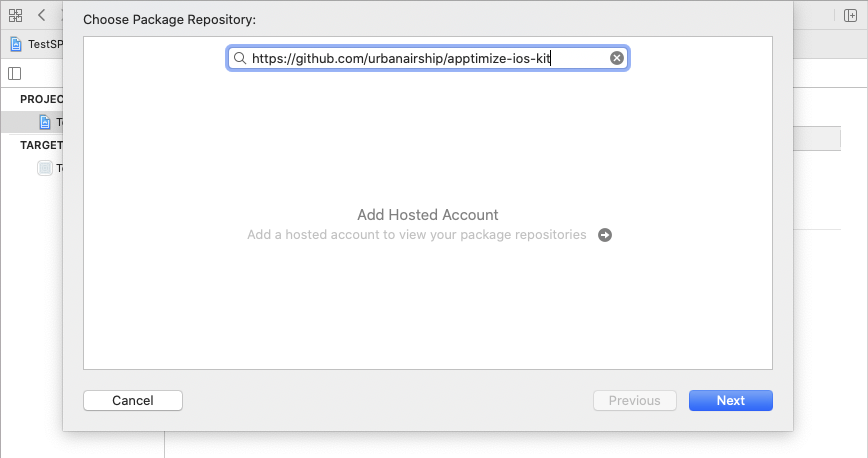
From the File menu, select Swift Packages > Add package dependency…
Select the project(s) to which you want to add Apptimize.
Add the package url https://github.com/urbanairship/apptimize-ios-kit and click Next.
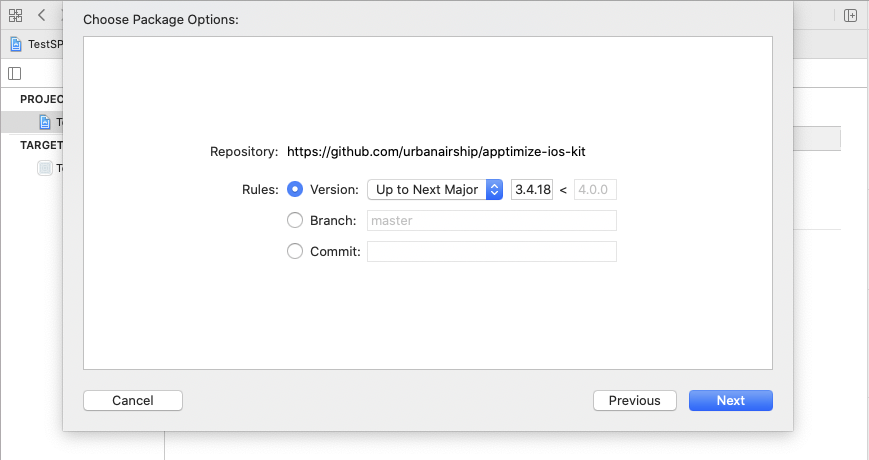
If you need a specific version you can change it on this screen, otherwise you should accept the default version and Up to Next Major and click Next.
CocoaPods
Refer to CocoaPod’s Getting Started Guide for detailed instructions.
Apptimize is distributed as an XCFramework and that requires that you are running a cocoapods version 1.10.0 or newer. To update you simply need to install the gem again.
$ [sudo] gem install cocoapods
Once you have created your Podfile, insert
pod 'Apptimize'to import Apptimize as a dependency.Once you have done so, re-run
pod installfrom the command line.Apptimize.xcframeworkis compatible with use_frameworks! for other dynamic and Swift dependencies.
Segment or mParticle Integration Kit
You can install our iOS SDK via our Segment or mParticle Integration Kits. You might want to use this option if you’re already tracking similar data with other services. This way, you can send your data to Segment or mParticle and with a flip of a switch, it will show up in Apptimize as well.
Learn more about our Integration Kits here!
Configure Your Project
Select the project from the Project navigator.
Select the target application. For watchOS this will be your watch application’s Extension target.
Go to the General tab and verify minimum deployment target.
- iOS / iPadOS / tvOS
Verify that your minimum deployment target is 11.0 or higher.
- watchOS
Verify that your minimum deployment target is 5.0 or higher.
Initializing Apptimize
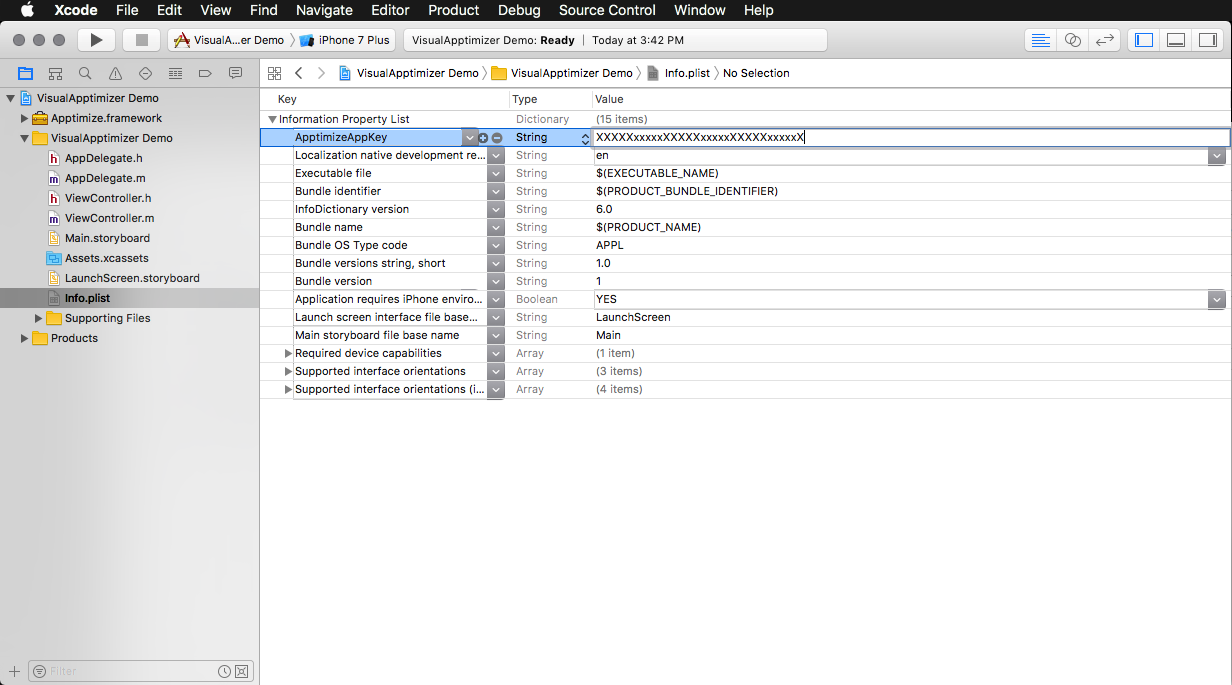
Open your project’s
Info.plist(typically found in the Supporting Files folder), navigate to the Editor menu, and choose Add Item. If Add Item is grayed out, make sure to click the main window.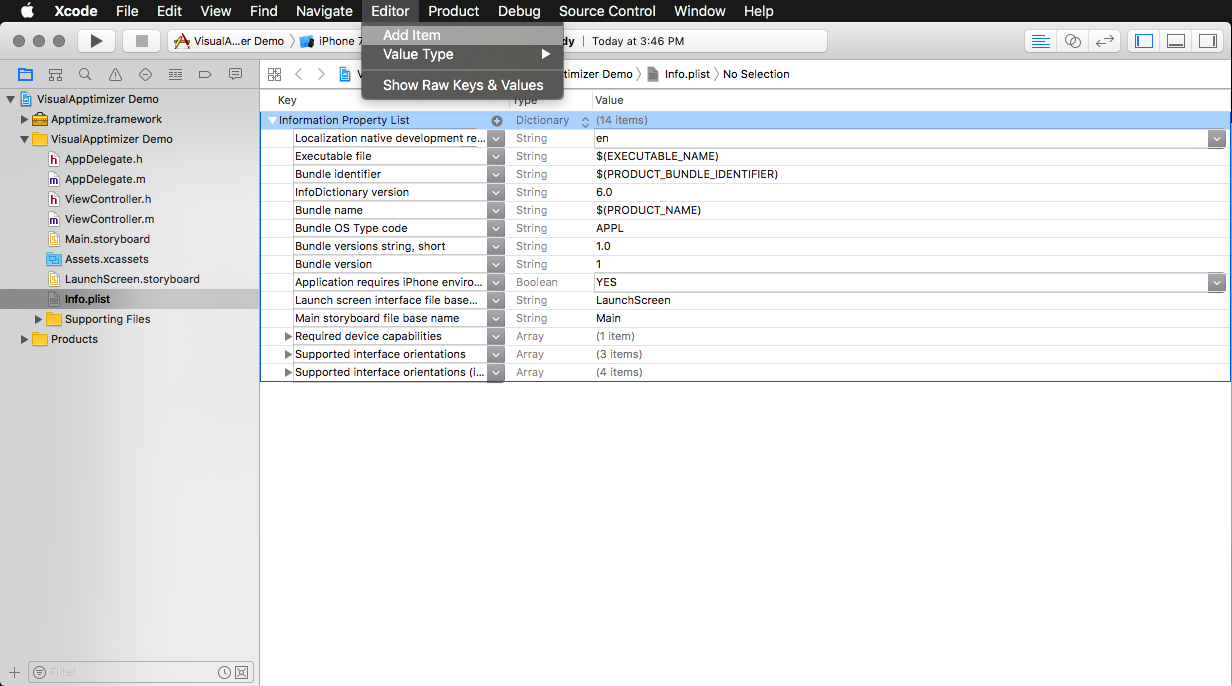
Make sure to name your new entry
ApptimizeAppKey.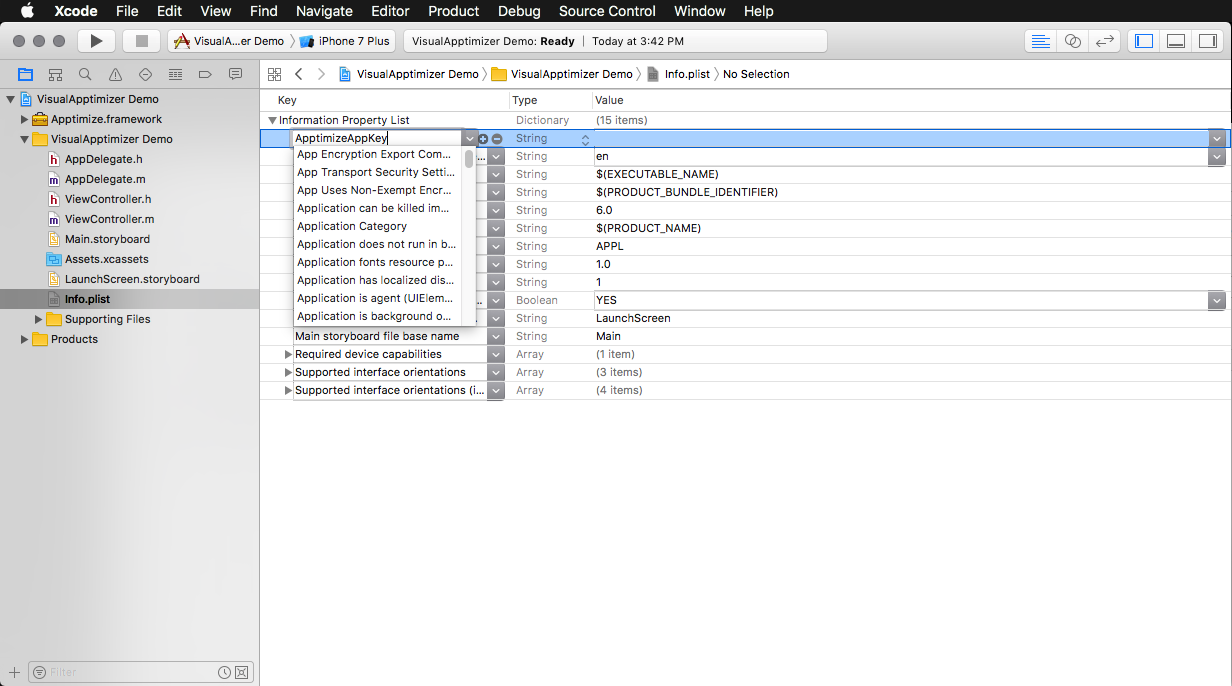
Add your application key, which is a 31 character key that can be found on the installation instructions while logged in or in your app settings.
Build your app to make sure that SDK was installed correctly. Verify that the SDK is loading by running your app and checking the Xcode console for the message
Apptimize: Version x.x.x.You’ve finished the Apptimize installation and are ready to configure your first A/B experiment!
Additional SDK Usage Notes
EU Cloud Site
Use the apptimizeOptions method to set your server region to EUCS if you are integrated in our EU Cloud site.
// Be sure to import the Apptimize SDK at the top of your objective-c file
#import <Apptimize/Apptimize.h>

// If you're using the zero line setup (ApptimizeAppKey set in plist)
// Set following Keys to eucs (String) in Info.plist
ApptimizeServerRegion

// If you're using the in code setup (Apptimize startApptimizeWithApplicationKey)
// Add the following ApptimizeOptions to setup
NSString *apptimizeAppKey = @"[YOUR_APP_KEY]";
NSDictionary *apptimizeOptions = @{ApptimizeServerRegionOption: ApptimizeServerRegionEUCS);

[Apptimize startApptimizeWithApplicationKey:apptimizeAppKey options:apptimizeOptions];
// Be sure to import the Apptimize SDK at the top of your swift file.
import Apptimize

// If you're using the zero line setup (ApptimizeAppKey set in plist)
// Set following Keys to eucs (String) in Info.plist
ApptimizeServerRegion

// If you're using the in code setup (Apptimize startApptimizeWithApplicationKey)
// Add the following ApptimizeOptions to setup
let apptimizeAppKey = "[YOUR_APP_KEY]"
let apptimizeOptions = [ApptimizeServerRegionOption : ApptimizeServerRegionEUCS]
Apptimize.start(withApplicationKey: apptimizeAppKey, options: apptimizeOptions)
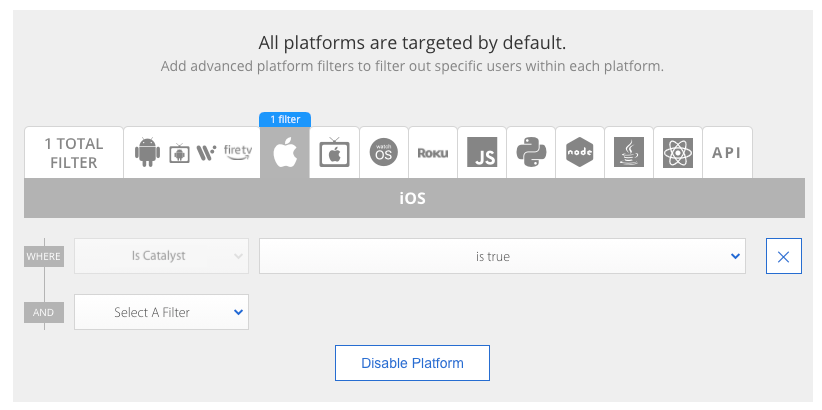
Tests Targeting Catalyst
You can target your tests to Catalyst by setting a platform filter for iOS and adding adding where Is Catalyst with a value of is true.