Amplitude
Amplitude is an analytics platform that allows customers to view a user’s full journey and measure their product health. Apptimize integrates with Amplitude by automatically importing the following for iOS and Android:
Events
Revenue
RevenueV2
User Properties using Amplitude’s Identify Interface
You are also able to use the Apptimize TestInfo API and our participation callbacks to forward your experiment data to Amplitude. Please see our data export guidelines for more information on how to set this up.
Automatic Event Importing
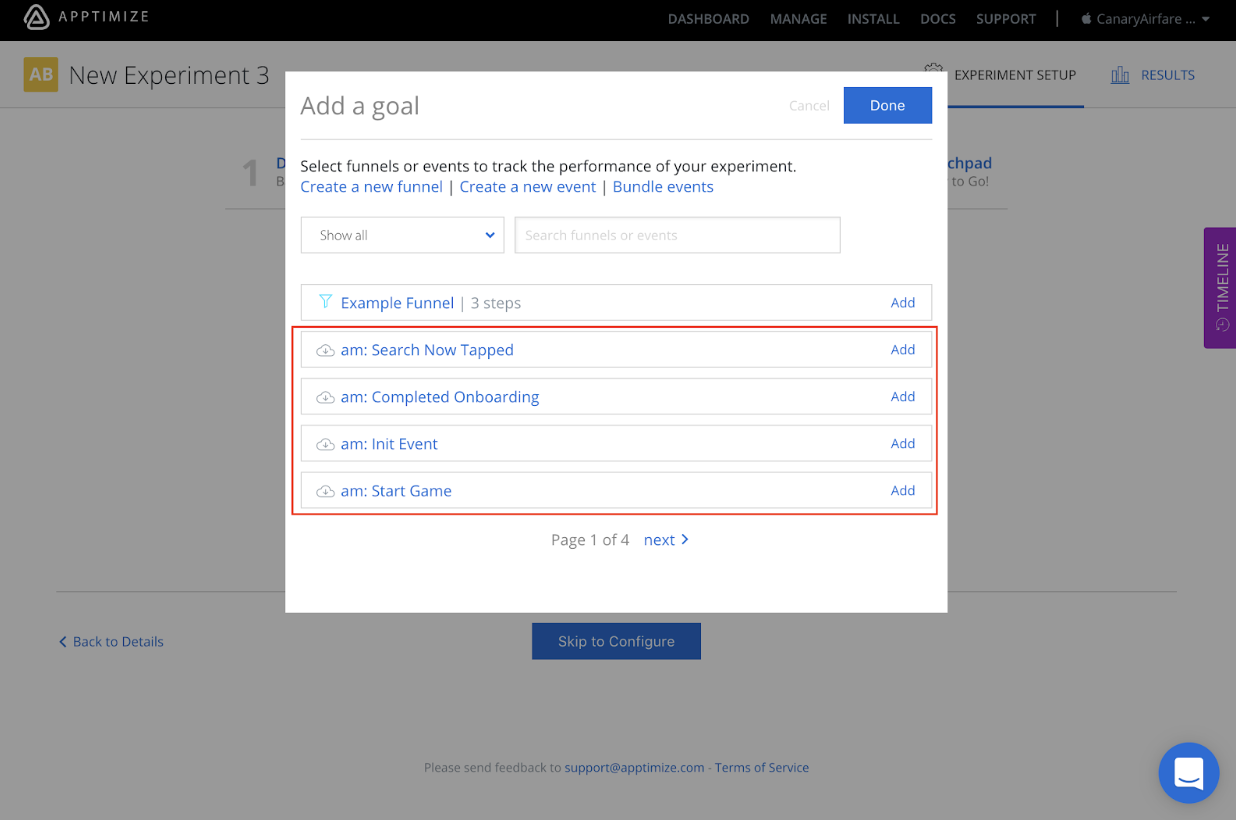
Apptimize detects Amplitude Events and automatically imports them for use as Goals within your Apptimize Experiments. Apptimize does not support Event Properties so please note that your events will only be imported per their names.
In order for the import to take place, you will first need to trigger your events in a live experiment. We recommend first running an A/A test in your app so that you can successfully have all existing events triggered, without affecting your end-users. Once experiment results are processed in your A/A test, you will see your Amplitude Events listed as possible goals for use in your future experiments.
Amplitude Events that have been automatically imported from Amplitude will appear with the prefix “am:” in your Goals like so:
Note that if you are using Amplitude Revenue, the double value included with your event will also be automatically imported and reflected in your Apptimize Results to help you determine the best performing variant. At the moment, it is a known issue that RevenueV2 events are tracked but their values are not available within Apptimize.
Automatic User Properties Importing
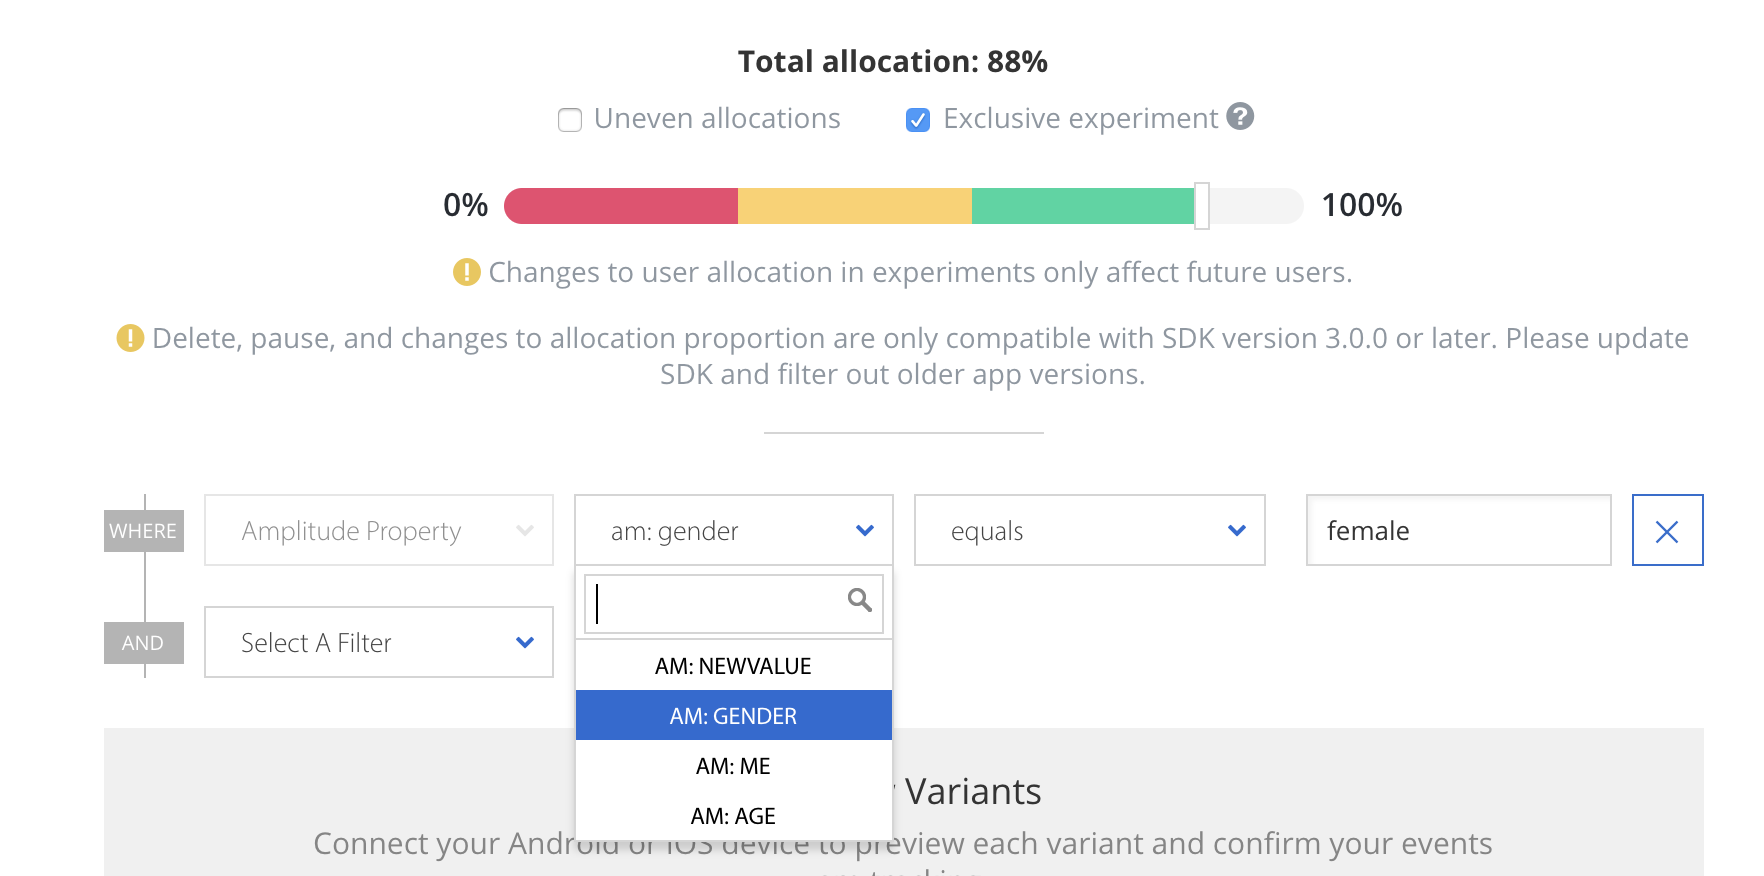
Apptimize automatically imports Amplitude User Properties and allows you to Target with them in your Apptimize Experiments.
To have User Properties to be available for your targeting, you simply need to fire an event that has an associated Amplitude User Property in your app while your device is paired with the Apptimize Dashboard. To pair with the Dashboard, you will need to open our Preview Variants tool, which will mirror your active device. Once you trigger the event that has the Amplitude User Property, Apptimize will detect it and automatically import the property for use within Apptimize. You should also be able to see the property fire on the left-hand side of the Preview window.
Once you have successfully paired and triggered your events, you will see your User Properties as selectable options in the Target & Launch filter dropdown:
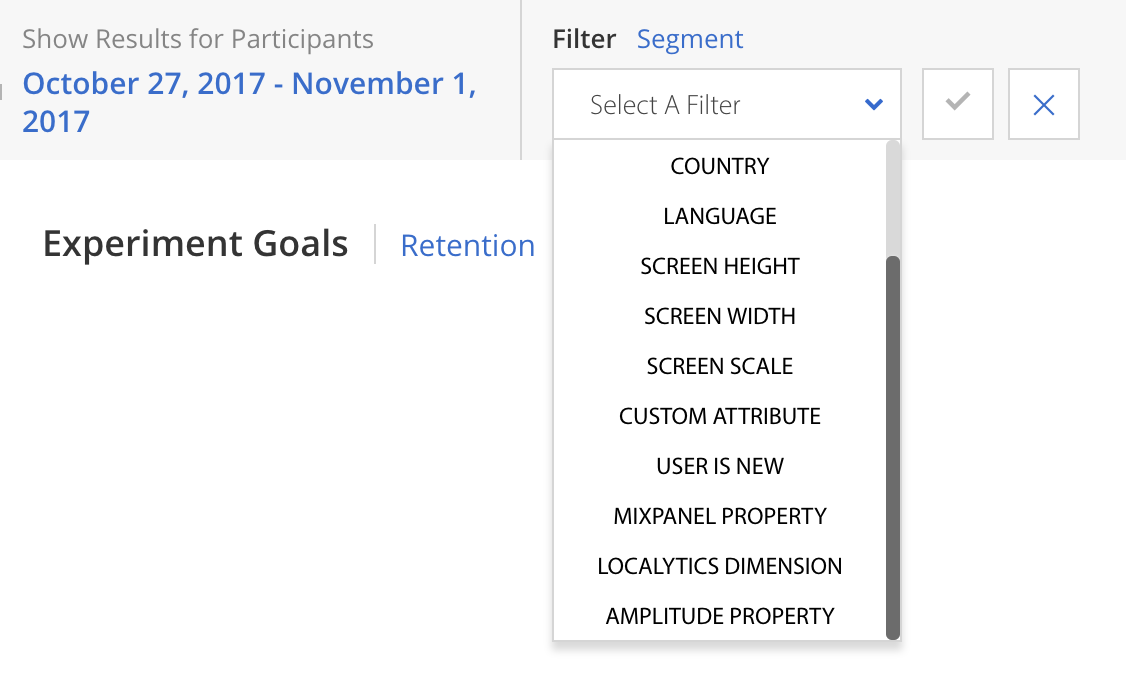
You will also be able to filter by your User Properties in your experiment’s Results:
Please note that Apptimize does not support Amplitude User Properties which are of the type ‘unsigned integer’.
If there are additional user properties (outside of those identified with Amplitude) that you would like to target with, please manually set these properties with our Custom Attributes.
Custom User IDs
We currently do not automatically import custom ID’s set with Amplitude’s setUserId method. We recommend calling the Apptimize setCustomerUserId method in the same location as where you call setUserId.
Exporting Experiment Data to Amplitude
Apptimize maintains a TestInfo API which can be used to export Apptimize experiment results data to Amplitude. Here are links to the documentation of this API:
Calling TestInfo will return a map of the following info for all actively running tests:
Experiment Name
Variant Name
Experiment ID
Variant ID
Enrollment in Experiment Date
Start Experiment Date
User has Participated since Enrollment
This data provides comprehensive detail around the user’s experiment participation, and can be parsed and/or passed along to Amplitude or any other third party as you please.
As an example, your output might look like:
testinfo: {
 "New Experiment" = "Variant \"original\" (157581) of test \"New Experiment\" (11452),
 enrolled since 2015-06-06 01:15:56 +0000 (started on 2015-06-06 00:47:15 +0000)";
For additional details and sample implementation, please see our Data Export documentation page.